Connection options for the Behringer Powerplay P2 Headphone Personal Monitor Amp
 February 7, 2019
|
Posted by Jon (admin)
February 7, 2019
|
Posted by Jon (admin)

A couple of years ago, Behringer released the Powerplay P2, a beltpack headphone/personal monitor amp that has opened up the world of In Ear Monitors to even the most budget-conscious musician. What this compact, flexible little gem allows you to do is this:
- Take a balanced mono Aux/Monitor send from your mixer and connect it to the P2 for a MONO In Ear Monitor mix. This is the way you would likely connect your P2 if you’re still using an analog mixer, since the Aux/Monitor sends are almost always mono.
- Take a stereo unbalanced headphone feed from your mixer and send it to the P2 for a STEREO In Ear Monitor mix. This is the way you would likely connect your P2 if your mixer has one or more stereo HEADPHONE outputs that you can assign a monitor mix to.
- Take a stereo linked output pair from your mixer and and send it to the P2 for a STEREO In Ear Monitor mix. This is way you would likely WANT to use the P2 if you’re using one of the many digital mixers and/or digital snakes on the market that allow you to stereo link a pair of output buses for a stereo IEM mix.
I should also mention that everything described in this post applies equally to the Fischer Amps In Ear Stick (which may have technically pre-dated the Behringer P2), the ART HP-1, and the Polsen BCPM-A2, all of which the Behringer P2 is functionally identical to.
Option 1
If you’re using option 1 and running your IEM mix in mono, you’re missing out. Granted, it’s still better than using the old conventional floor wedges, for obvious reasons: better control over stage volume and a personalized mix for each musician. Just set the Stereo/Mono switch on the P2 to mono and off you go. You can connect using any regular old XLR mic cable, a TRS to XLR cable, or even a TRS to TRS cable. However, using a stereo feed for your in ear monitors will open up a world of possibilities, like panning things in your ears to mimic the layout of the stage, giving you better separation and clarity of individual instruments and voices, and a sense of space. If you’ve ever listened to music on a home stereo, computer speakers, or studio monitors with a mono/stereo switch that lets you compare the two, you get what I’m saying. But I digress.
Option 2
Option 2 is relatively straightforward. In fact, if you’re using option 2, you may not even technically NEED a Powerplay P2, although it works fine this way, too. In this scenario, you’re getting the signal from an already amplified headphone output on your mixer or from a headphone amp, so you could either use a regular headphone extension cable or a passive belt clip device such as the Powerplay PM1, the Elite Core WBP or the Elite Core WBP-VC. Whatever the case, connecting it up is simple. All you need is a 1/4″ TRS to XLR male cable. You connect the 1/4″ end to your headphone output, connect the XLR end to your P2 (or PM1, WBP, WBP-VC), and you’re good to go. If you are using the P2, be sure that the internal switch is set to “stereo”. The only limitation with this option is that most mixers (even digital) usually only have a single headphone output jack. So if you need to run more than one stereo IEM mix, that won’t work (again, unless you’re using a separate, multi-channel headphone amp).
Option 3
Option 3 is the one that seems to cause the most confusion, and that’s what I’ll focus on for the remainder of this post. The reason for the confusion is this: the P2 accepts either a balanced mono signal or a stereo unbalanced signal, but both are carried over a single, regular XLR microphone cable. This is where most people start scratching their heads. Sending a stereo signal over XLR cables is typically done with two separate cables: one for the Right, and another for the Left. In fact, this is exactly how you do it with Behringer’s original Powerplay P1 headphone amp, which had two separate XLR inputs. However, thanks to the handy internal switch on the newer P2, it will also accept a stereo signal on a single mic cable.
The way it accomplishes this feat is this: a conventional, three-pin XLR microphone cable contains two separate inner wires surrounded by a shield. Typically one wire carries the +/hot of the signal, while the other wire carries the -/cold (the same signal, but it’s 180 degrees out of phase with itself). The shield is used for the ground connection. In audio terms, this is what we typically describe as a balanced connection. At the input (of the mixer, mic preamp, etc.), the phase is flipped on the cold side so it’s in phase with the hot side, the hot and cold are summed together, and any noise that it picked up along the way is rejected using the phenomenon of phase cancellation. That’s basically the way a balanced connection works: it uses phase cancellation to remove noise and interference from the signal.
However, the same XLR cable can also be used for an unbalanced stereo connection, where the Right side of the stereo signal is carried over one wire, the Left side is carried over the other wire, and the shield is used for the ground. This is more akin to how consumer audio connections are typically made (think about the plug on a regular pair of headphones, or one of the 1/8″ TRS to TRS cables that you might use to connect your smartphone to the aux input of your car stereo), rather than professional audio gear. However, this is exactly how we need things to work for the P2 to give us a stereo mix for our in-ear monitors.
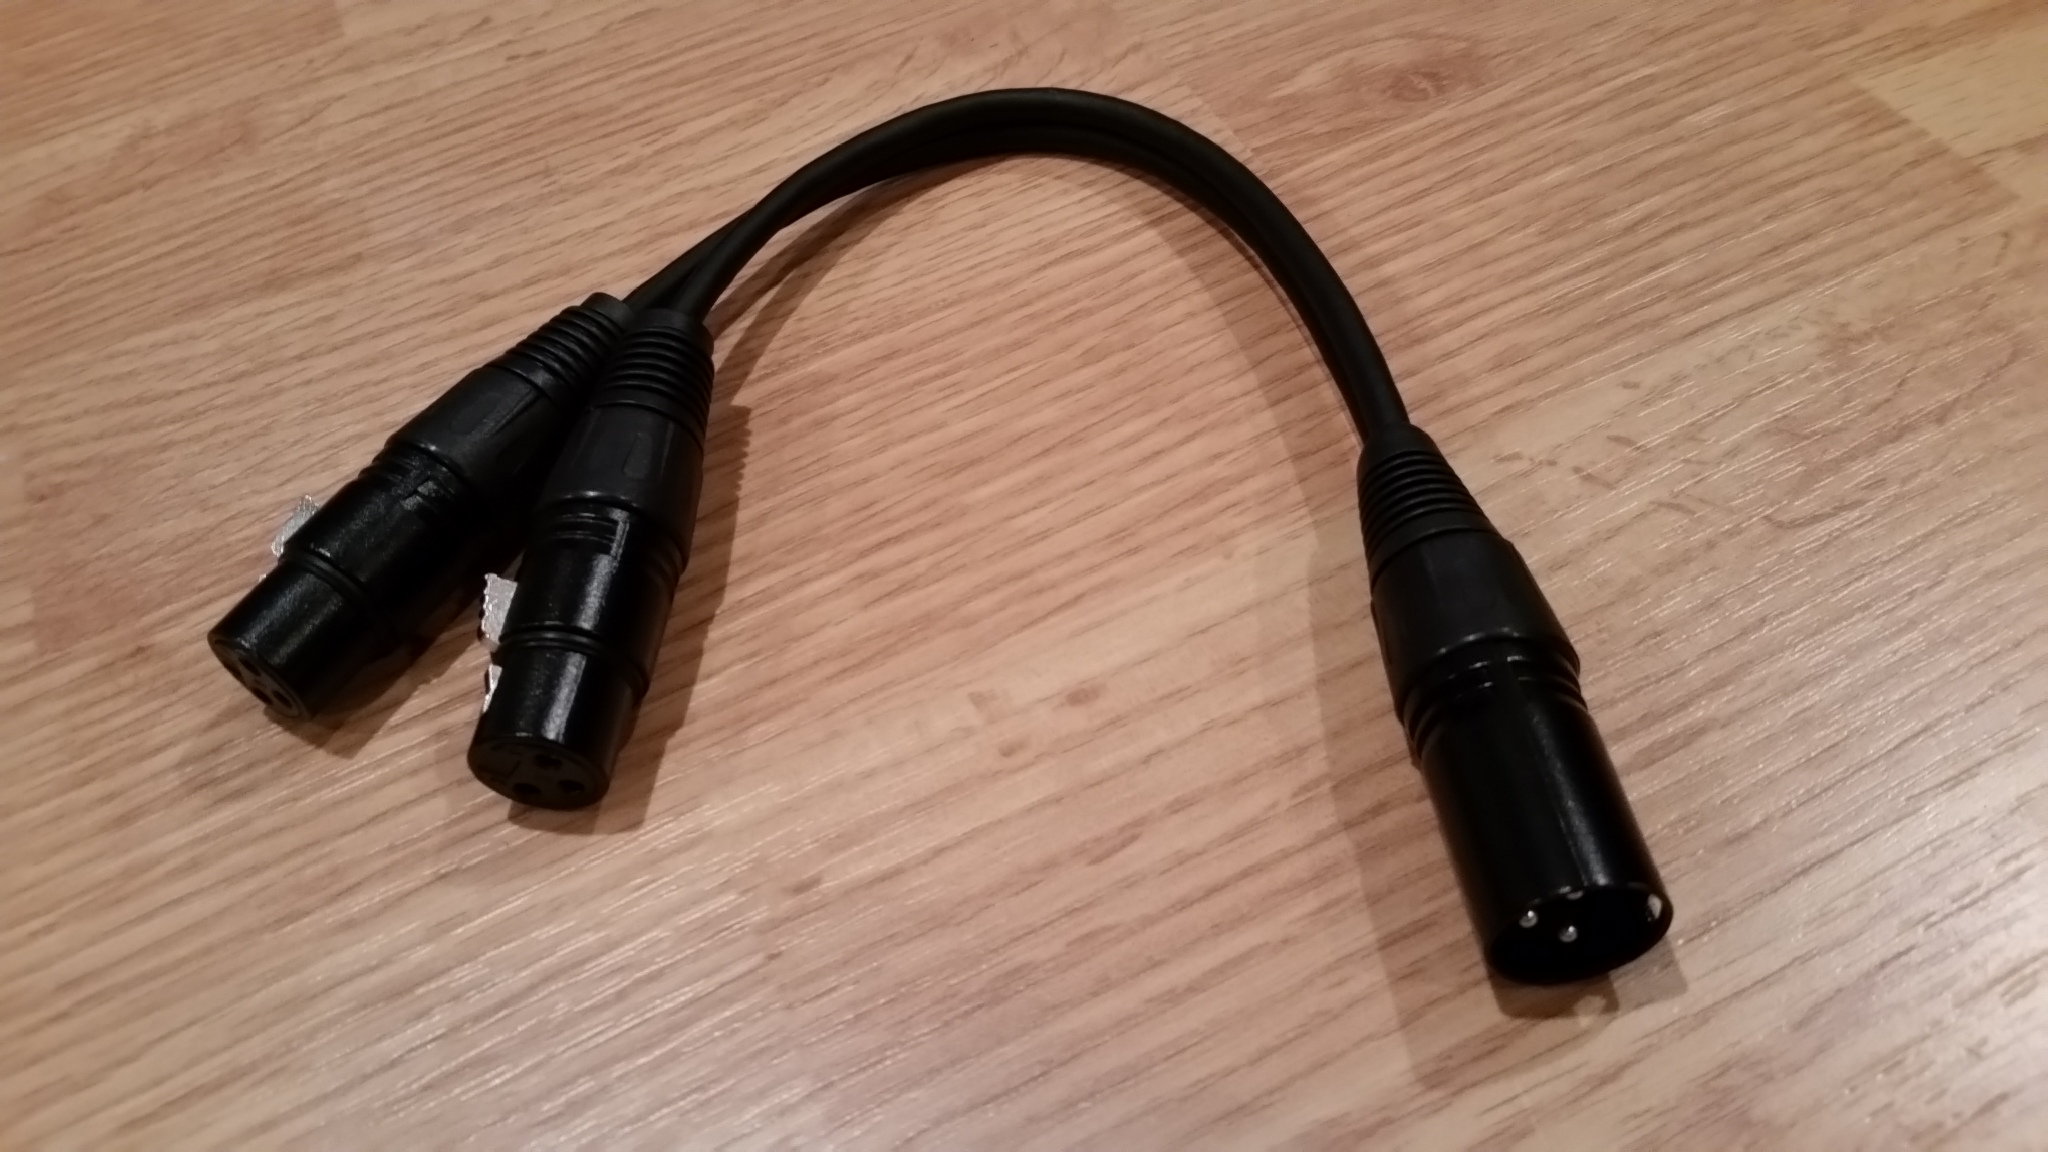
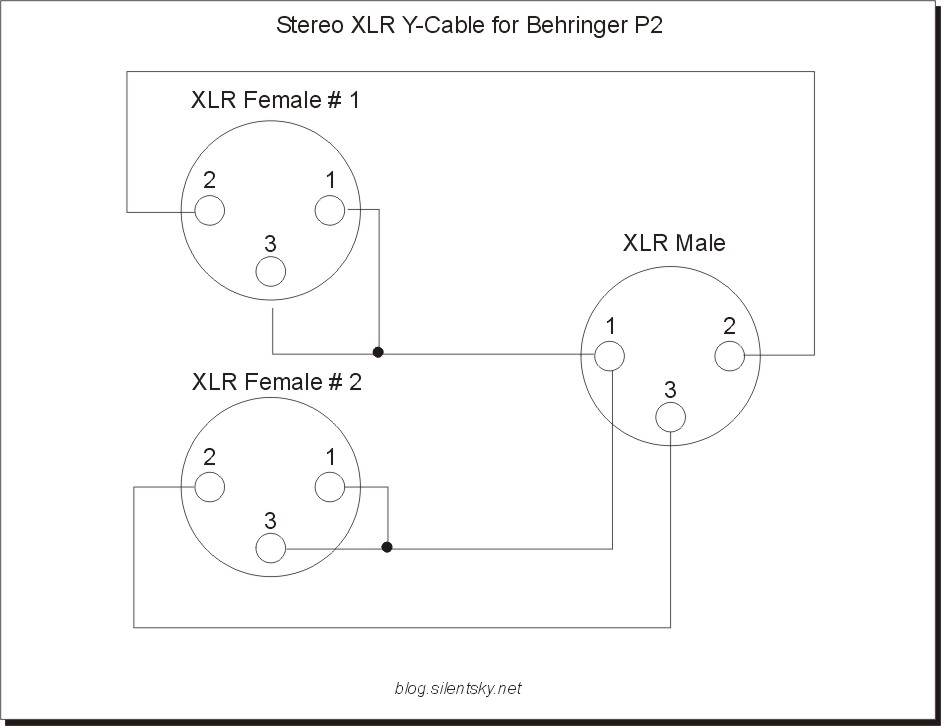
So, if you’re like most users and want to connect a stereo linked output pair from your mixer to your P2 (option 3), this is where you may get tripped up. To my knowledge, there doesn’t seem to be any off-the-shelf, ready-made cables that do exactly what’s needed in this scenario. But it’s relatively easy to build, so I’ll describe it for you now. What you need for this particular connection option is a y-cable with two XLR female plugs connected to a single XLR male plug. Here’s how the cable should be wired internally:
- Pin 2 of the first XLR female is connected (via one of the inner conductor wires) to Pin 2 of the XLR male.
- Pin 2 of the second XLR female is connected (via the other inner conductor wire) to Pin 3 of the XLR male.
- Pin 3 of both XLR female plugs are shorted to Pin 1. This is standard practice for connecting a balanced output to an unbalanced input.
- Pin 1 of both XLR female plugs are connected (via the shield) to Pin 1 of the XLR male.
Now let’s say that instead of using a stereo linked XLR output pair, you want to use a stereo linked pair of 1/4″ outputs instead (e.g. using the Aux/Line outputs of the X32, X32 Rack, X32 Compact, or X32 Producer). The principle is the same, and only the connectors are different:
- The Tip of the first 1/4″ plug is connected (via one of the inner conductor wires) to Pin 2 of the XLR male.
- The Tip of the second 1/4″ plug is connected (via the other inner conductor wire) to Pin 3 of the XLR male.
- You’ll need to use 1/4″ TS (Tip Sleeve) plugs instead of TRS (Tip, Ring, Sleeve) plugs, so the Ring of each balanced 1/4″ output is automatically shorted to the Sleeve of the inserted plug, which again, is standard practice for connecting a balanced output to an unbalanced input.
- The Sleeve of both 1/4″ plugs are connected to the shield, which is connected to Pin 1 of the XLR male.

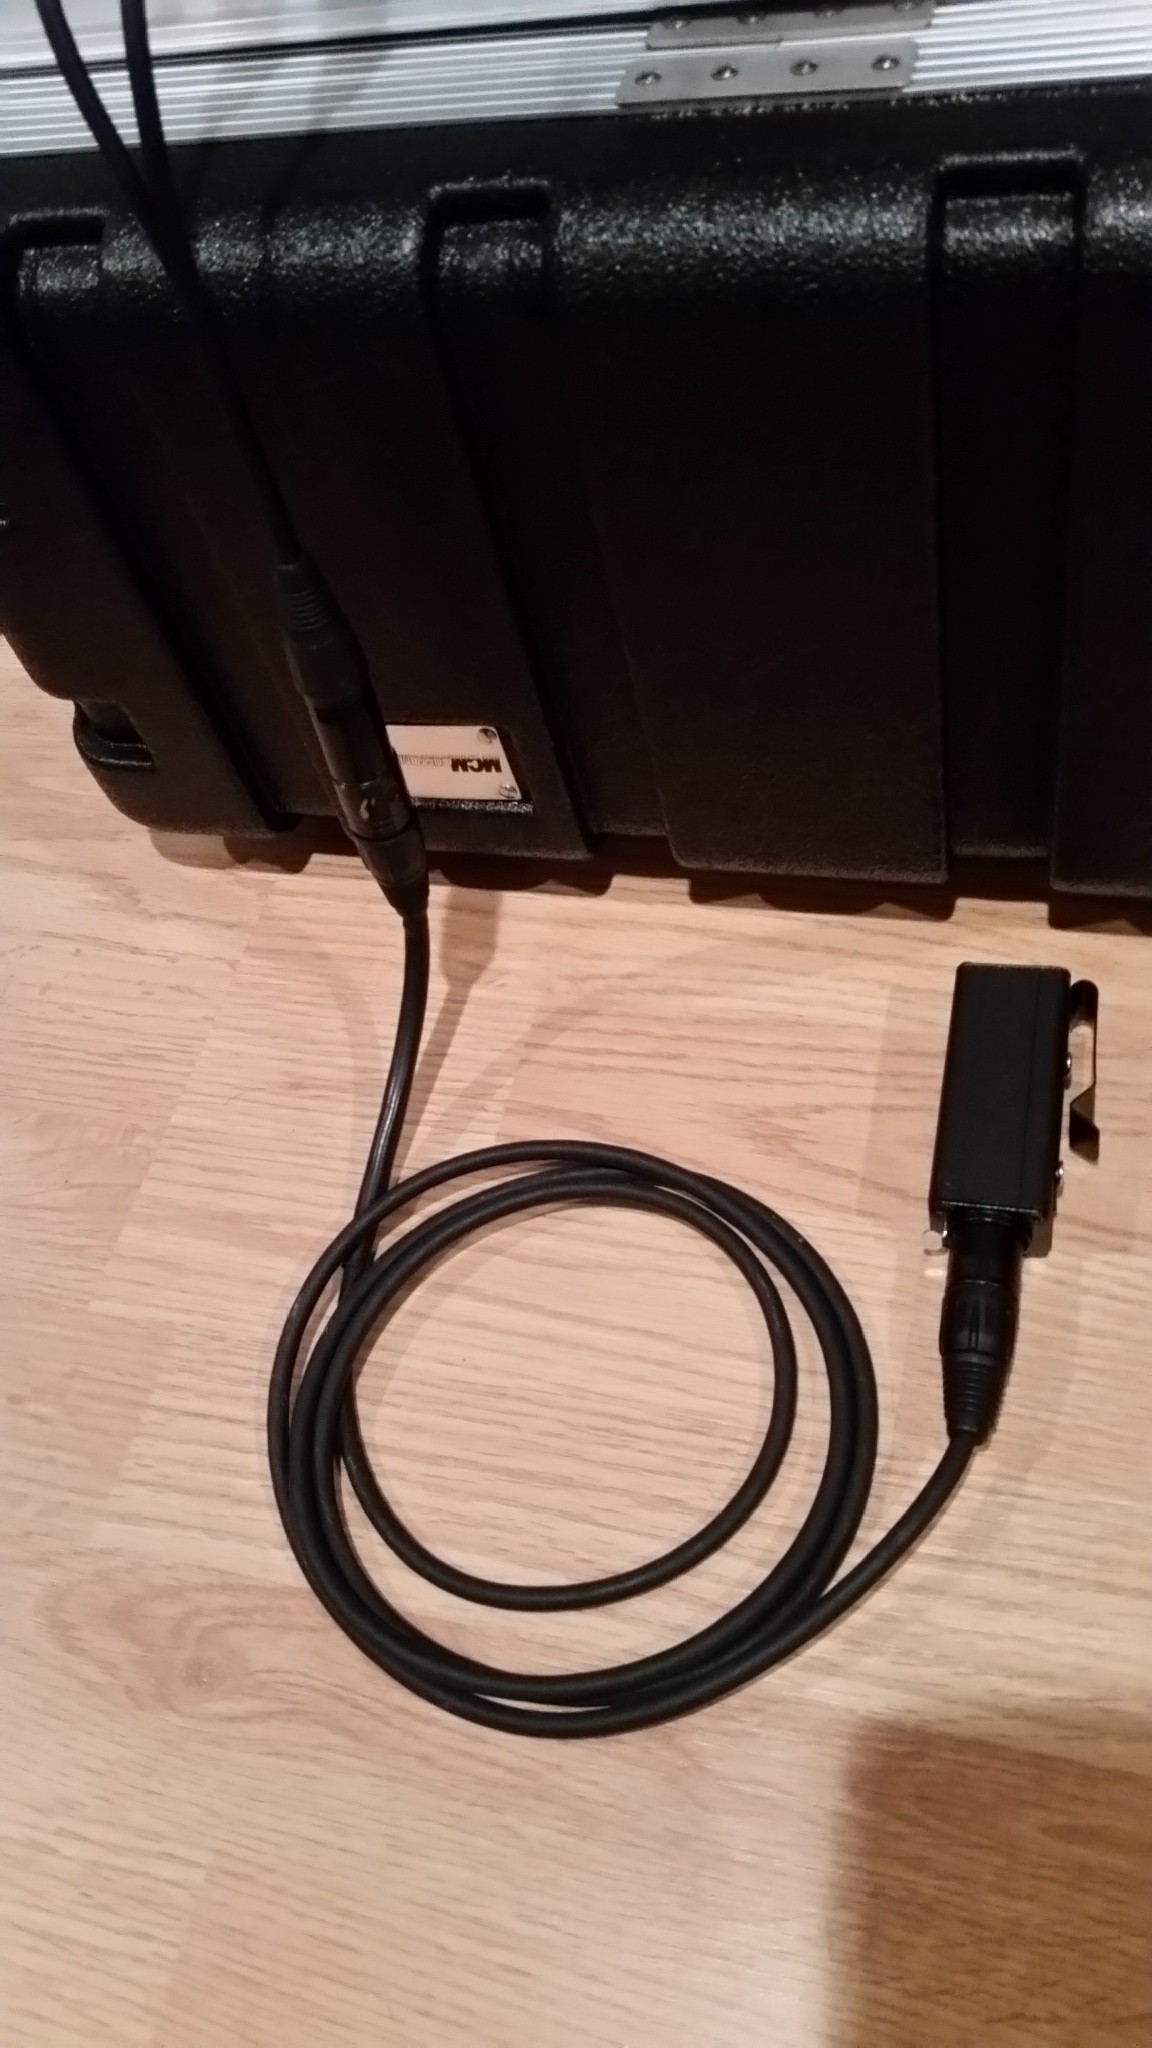
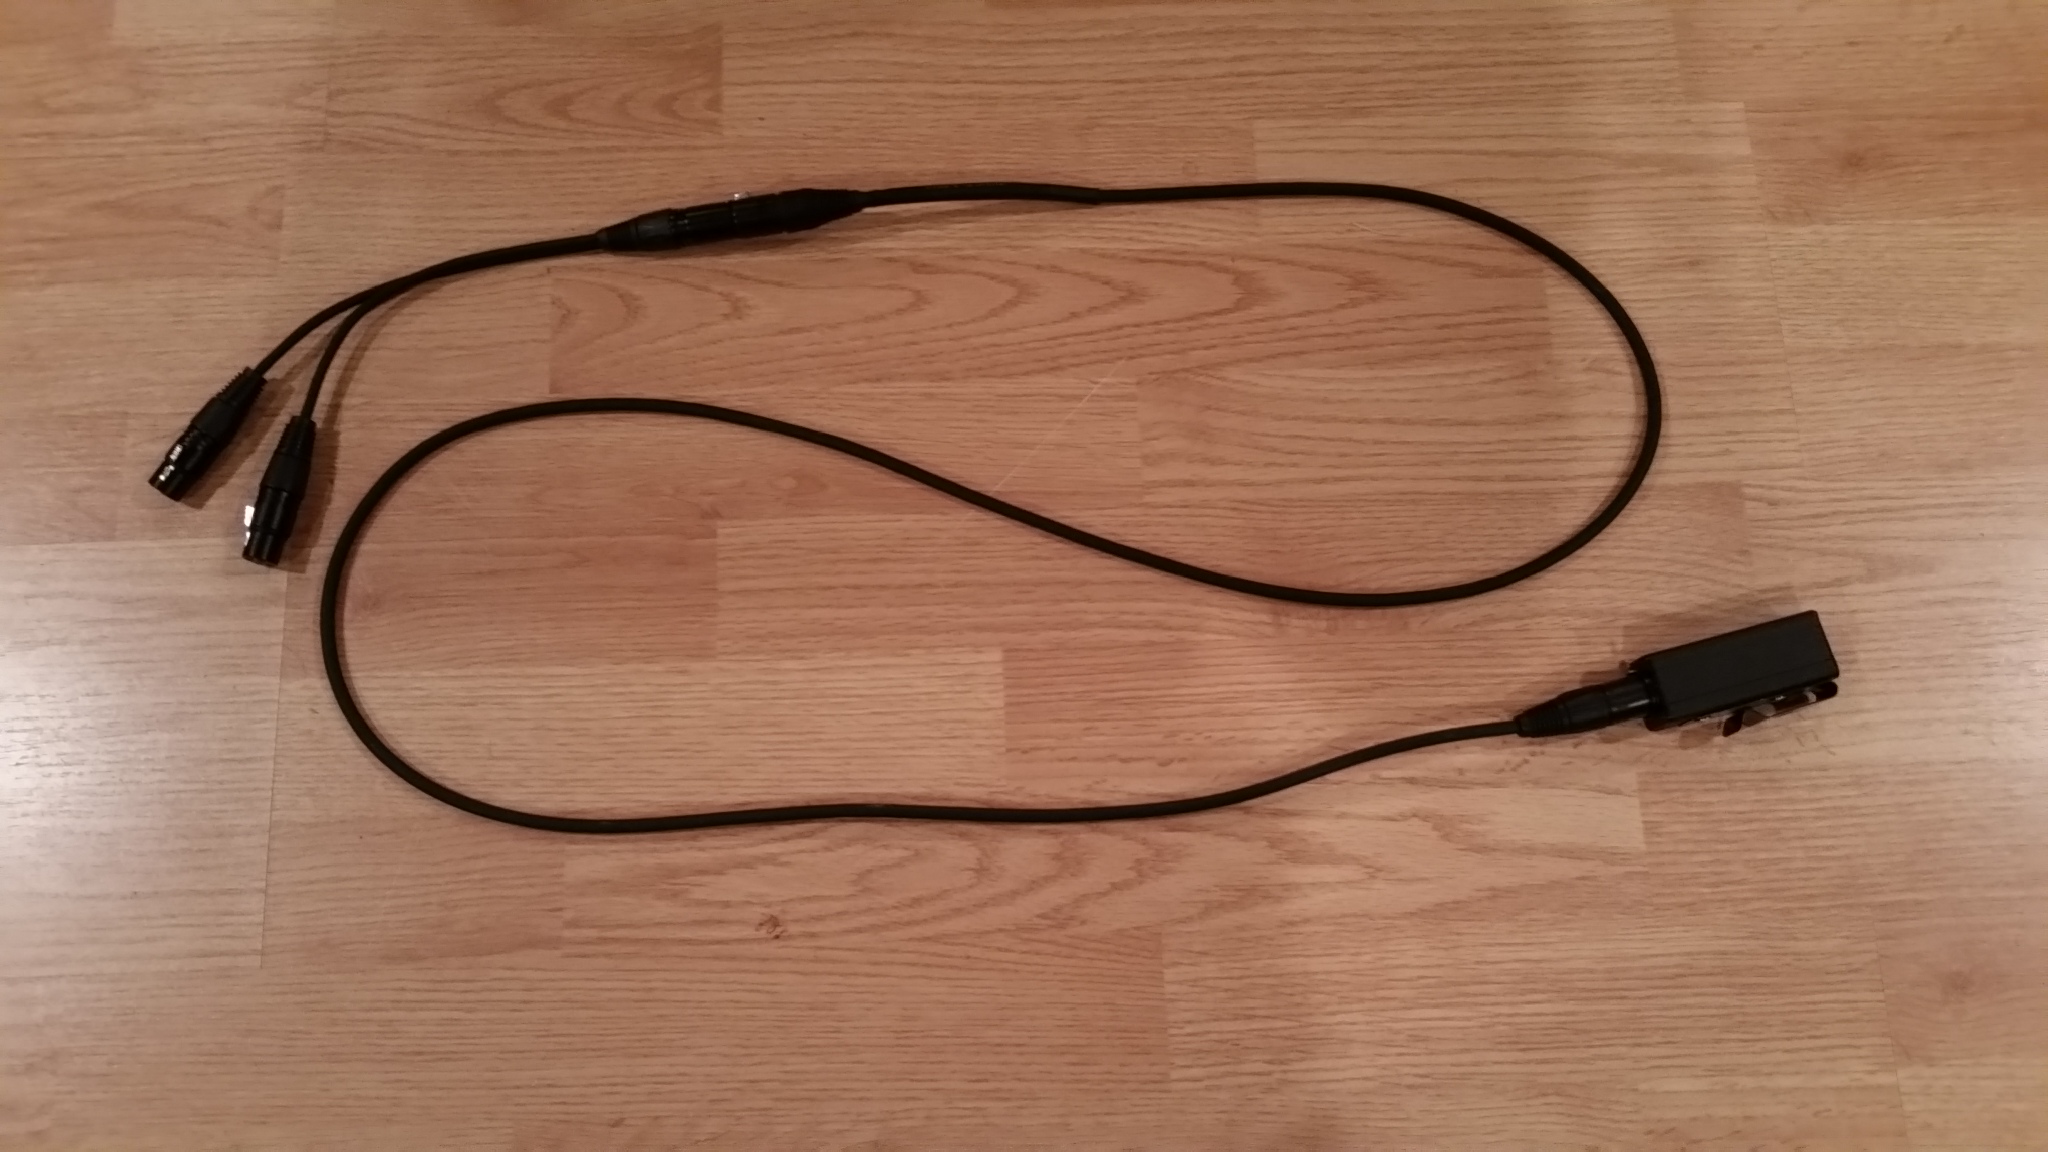
That’s it! To connect things up, just plug the XLR female (or 1/4″) ends of the y-cable into your mixer’s stereo linked output jacks, connect a standard XLR microphone cable to the XLR male plug of the y-cable, then connect the XLR male end of the mic cable to your P2. This will give you a stereo, unbalanced signal for the P2 over a single regular XLR mic cable. Now you can start enjoying the 3-dimensional realism of stereo sound in your in ear monitors!
Click here to view my other website, where you can purchase a cable like the one described above, if you don’t have the time, tools, or skills to build your own. Just scroll down until you see “Dual XLR or 1/4″ to Single XLR Stereo Cable for Behringer P2 Headphone Amp”.
 Categories: Live Sound, Recording, Reviews
|
Categories: Live Sound, Recording, Reviews
|  Tags: behringer, compact, ear, fischer, iem, in, monitor, p2, powerplay, producer, rack, stick, X-Air, x32, XR18